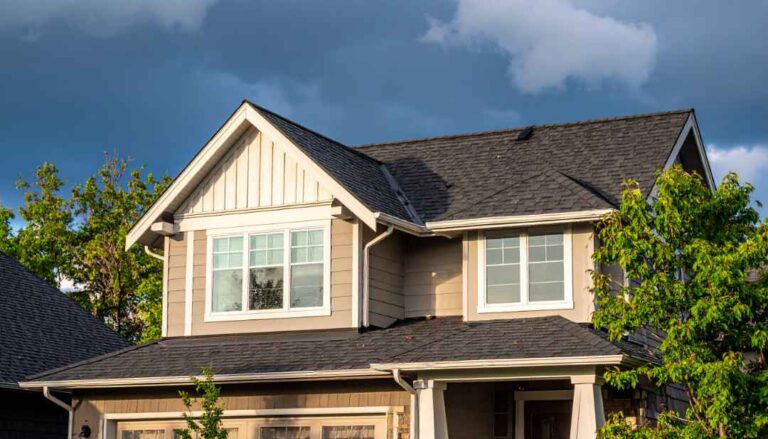
Vinyl siding is a preferred choice for homeowners due to its long-lasting durability, low maintenance requirements, and ability to enhance curb appeal. However, like any exterior surface, it is not immune to wear and tear. Over time, holes can develop due to weather exposure, accidental impacts, or even small animals seeking shelter. These holes may seem minor at first, but they can compromise both the appearance and protective function of your siding, allowing moisture to seep in and potentially leading to structural issues such as mold growth or interior water damage.
Fortunately, repairing vinyl siding doesn’t have to be a costly or time-consuming process. With the right tools and techniques, you can address holes efficiently without the need for professional repairs. This guide will provide everything you need to confidently fix vinyl siding holes using a repair kit. We’ll explore the most common causes of damage, help you choose the right repair kit, and walk you through a step-by-step repair process to ensure a long-lasting and seamless fix.
By understanding how to properly maintain and repair your siding, you can extend its lifespan and keep your home looking its best. Whether you’re dealing with a small puncture or a larger crack, taking the time to repair vinyl siding promptly will prevent further damage and save you from costly replacements down the line.
Key Takeaways:
- Vinyl siding hole repair kits are essential for keeping your home’s exterior in top condition.
- Holes can be caused by weather, impact, pests, or improper installation.
- Selecting the right repair kit ensures a seamless and durable fix.
- Proper preparation and following a step-by-step repair guide lead to successful results.
- Regular maintenance can help prevent future damage and extend the lifespan of your siding.
Introduction to Vinyl Siding Hole Repair Kits
Maintaining the integrity and aesthetic appeal of your home’s exterior requires proper care and attention to detail, and vinyl siding plays a crucial role in both. While it is designed to withstand harsh weather and everyday wear, it is not indestructible. Over time, exposure to wind, rain, and physical impact can result in cracks, holes, or even larger sections of damage.
A vinyl siding hole repair kit provides homeowners with an easy and cost-effective solution to fix minor damage without replacing entire sections of siding. These kits typically include pre-cut patches, strong adhesives, and color-matched fillers designed to seamlessly blend with your existing siding. Some advanced kits may even come with specialized tools to make the application process easier and ensure a professional-looking result.
By understanding how to use these repair kits correctly, homeowners can protect their property from further deterioration, maintain curb appeal, and avoid costly professional repairs. In the sections ahead, we will break down how to assess siding damage, choose the best repair kit for your needs, and execute a flawless repair to restore your siding to its original condition.
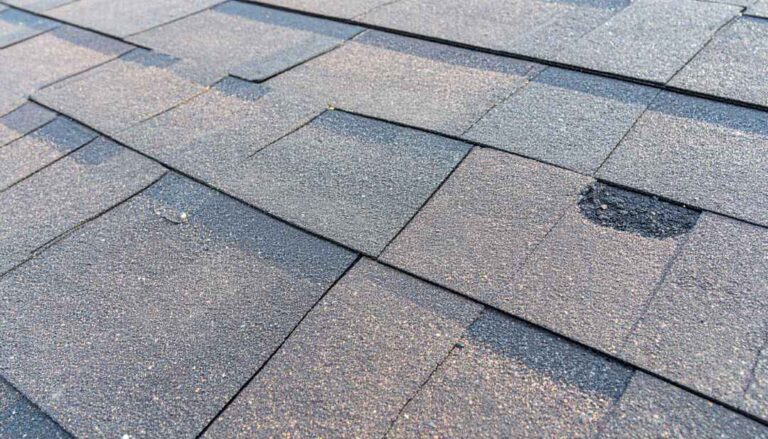
Common Causes of Holes in Vinyl Siding
Vinyl siding is one of the most popular exterior home materials due to its affordability, durability, and low maintenance requirements. However, despite its resilience, it is not immune to damage. Holes in vinyl siding can compromise not only the appearance of your home but also its structural integrity, leading to potential moisture infiltration, pest problems, and energy inefficiency. Understanding the most common causes of vinyl siding holes can help homeowners take preventive measures and address damage promptly.
1. Weather Damage
One of the most significant threats to vinyl siding is extreme weather conditions. Over time, exposure to harsh elements can weaken the material and create holes or cracks.
- High Winds: Strong winds can cause airborne debris, such as branches, rocks, or even loose roofing materials, to strike the siding and create punctures.
- Hailstorms: Hail is particularly damaging to vinyl siding. Large hailstones can dent, crack, or even punch holes through the material, especially if the siding is older or has become brittle over time.
- Heavy Rain & Ice: Repeated exposure to heavy rain can wear down the siding, making it more susceptible to damage. In colder climates, ice buildup and rapid temperature fluctuations can cause expansion and contraction, leading to cracks and fractures.
How to Prevent Weather-Related Damage
- Trim overhanging tree branches to minimize the risk of wind-blown debris.
- Inspect your siding after major storms to identify any minor cracks or holes before they worsen.
- Consider impact-resistant siding options in regions prone to severe weather.
2. Impact from Objects
Accidental impacts are another leading cause of holes in vinyl siding. Homeowners often overlook how everyday activities and common objects can lead to damage over time.
- Lawn Equipment & Tools: Lawn mowers, weed trimmers, and other landscaping tools can accidentally strike the siding, leaving behind small holes or cracks.
- Sports Equipment: If you have children playing in the yard, stray baseballs, soccer balls, or hockey pucks can easily dent or break through the siding.
- Falling Branches: Even small branches falling from trees can puncture vinyl siding, especially if they are propelled by strong winds.
How to Prevent Impact Damage
- Establish a safe play area away from the home’s exterior.
- Use caution when operating lawn equipment near siding.
- Regularly trim trees to reduce the risk of falling limbs.
3. Pests and Animals
Rodents, insects, and birds can cause significant damage to vinyl siding, often seeking shelter within small openings and creating larger holes over time.
- Rodents: Squirrels, mice, and rats may gnaw on vinyl siding in search of entry points into your home, especially during colder months.
- Insects: Certain insects, such as termites and carpenter ants, can exploit gaps in siding and weaken the material further.
- Birds & Woodpeckers: Birds may peck at siding looking for food or nesting sites, leading to unsightly holes.
How to Prevent Pest Damage
- Seal any existing gaps or cracks to prevent pests from getting inside.
- Regularly inspect your home’s exterior for signs of animal activity.
- Use deterrents such as bird spikes or motion-activated repellents to discourage nesting.
4. Improper Installation
Vinyl siding must be installed correctly to function as intended. Poor installation can lead to structural weaknesses that make the siding more susceptible to damage.
- Over-Tightening or Loose Fitting: If nails or fasteners are too tight, the siding won’t be able to expand and contract with temperature changes, increasing the risk of cracks. Conversely, if it’s too loose, wind can get behind it and cause it to warp or break.
- Poor Seam Alignment: Misaligned panels can create weak points where moisture can seep in, leading to premature deterioration.
- Low-Quality Materials: Some cheaper vinyl siding options are more prone to cracking under pressure, making them more vulnerable to damage over time.
How to Prevent Installation Issues
- Always hire experienced professionals to install or repair your siding.
- Use high-quality siding materials that offer better durability.
- Perform periodic checks to ensure panels are properly secured and aligned.
5. Settling of the Home
Over time, all homes experience some degree of settling, which can result in small shifts that put stress on exterior materials, including vinyl siding.
- Structural Movement: As the home shifts, siding panels may warp, crack, or separate at seams, creating entry points for moisture and pests.
- Foundation Shifts: In some cases, changes in the foundation can lead to siding misalignment, which increases the likelihood of holes forming.
How to Prevent Damage from Settling
- Regularly inspect siding seams and joints for gaps.
- Address any visible foundation issues early to prevent larger structural problems.
- Use flexible caulking in areas prone to minor shifts to help absorb movement.
Recognizing the common causes of holes in vinyl siding is the first step in protecting your home’s exterior. Whether caused by harsh weather, accidental impacts, pests, poor installation, or natural settling, addressing these issues promptly can prevent further damage and costly repairs. By staying proactive with routine maintenance and repairs, you can extend the lifespan of your vinyl siding and keep your home looking pristine for years to come.
Choosing the Right Vinyl Siding Hole Repair Kit
Maintaining the integrity of your vinyl siding is essential for both aesthetic appeal and structural protection. When holes or cracks appear, addressing them promptly prevents further damage and helps maintain the weather resistance of your home. A vinyl siding hole repair kit offers a cost-effective, do-it-yourself solution, but with numerous options on the market, selecting the right kit can be overwhelming. Understanding the key features and components of a high-quality repair kit will ensure a durable and visually seamless fix.
1. Assess the Size and Type of Damage
Not all vinyl siding repair kits are created equal, and different kits cater to various types of damage. Before making a purchase, carefully evaluate the extent of the damage to determine the most appropriate repair solution.
- Small Punctures or Nail Holes: If you’re dealing with tiny holes left by nails, screws, or small impacts, a simple caulking-based repair kit with color-matched filler will suffice.
- Medium-Sized Cracks or Holes: For damage caused by hail, minor impacts, or settling, look for a kit that includes adhesive patches or flexible repair compounds. These materials provide stronger reinforcement and prevent the damage from worsening over time.
- Large Holes or Severely Damaged Panels: When the damage is more significant—such as large cracks or missing chunks—consider a kit that includes vinyl patches that blend seamlessly with your siding. In extreme cases, you may need to replace the entire section of siding.
A proper assessment of the damage ensures that you purchase a kit with the right materials to achieve a secure and long-lasting repair.
2. Consider the Materials in the Kit
A high-quality vinyl siding repair kit should include materials designed for durability, flexibility, and ease of application. The most effective kits generally contain:
- Vinyl Patches or Repair Tape: Some kits include adhesive-backed vinyl patches or tapes that provide strong reinforcement over damaged areas. Ensure the patches are made of weather-resistant material to prevent peeling over time.
- Flexible Filler or Caulk: A vinyl-safe filler or caulk is ideal for smaller holes and cracks. Choose one that is UV-resistant and waterproof to ensure longevity.
- Adhesive or Bonding Agent: Some repair kits include a strong adhesive designed to bond patches securely to the siding without cracking or shrinking over time.
- Color-Matched Paint or Touch-Up Materials: If your kit doesn’t include color-matched materials, you may need to purchase separate vinyl-safe paint to ensure a seamless blend with the existing siding.
- Application Tools: The best kits come with applicators, spatulas, or smoothing tools to help achieve a professional-looking finish without visible seams or bumps.
When choosing a kit, prioritize quality over price—low-quality materials may fail to withstand outdoor conditions, leading to premature peeling or cracking.
3. Ease of Application
If you’re a DIY beginner, selecting a repair kit with clear, step-by-step instructions is crucial. Some kits provide video tutorials or illustrated guides, making it easier to follow the repair process. Consider the following:
- Peel-and-Stick Patches: These are the easiest to use and work well for minor damage.
- Two-Part Epoxy Solutions: These require mixing but provide a stronger bond for more significant damage.
- Paintable Fillers vs. Pre-Colored Patches: If you prefer a one-step solution, opt for pre-colored patches that match standard siding shades. If your siding has a custom color, a paintable filler may be the best option.
For best results, choose a repair kit that aligns with your comfort level and experience with home repairs.
4. Check for Compatibility with Your Siding
Before purchasing a vinyl siding repair kit, ensure it is compatible with your existing siding material in terms of:
- Color Match: If the repair material doesn’t match your siding’s shade, it may stand out and affect your home’s curb appeal. Some brands offer custom color-matching services, or you may need to purchase touch-up paint separately.
- Texture & Finish: Vinyl siding comes in smooth, wood grain, or brushed textures. Using a mismatched patch can create an uneven or noticeable repair. Look for a kit that offers different texture options or flexible materials that blend in seamlessly.
- Weather Resistance: Your repair materials should be UV-resistant, waterproof, and capable of withstanding temperature fluctuations. Inferior materials may crack or fade over time, leading to a need for repeated repairs.
Checking these factors beforehand ensures a professional-quality repair that won’t detract from the overall look of your home.
5. Read Customer Reviews and Ratings
One of the best ways to gauge the effectiveness of a vinyl siding hole repair kit is by reviewing customer feedback. Before making a purchase, consider:
- Durability & Longevity: Look for reviews mentioning how well the repair held up over time, particularly against weather exposure.
- Ease of Use: DIY homeowners often share insights into whether the kit was beginner-friendly or required advanced skills.
- Effectiveness in Matching Existing Siding: Some kits provide excellent color-matching solutions, while others may require additional paint or blending techniques.
Well-reviewed brands like Owens Corning, James Hardie, and DAP tend to offer high-quality repair solutions with reliable durability. Checking verified customer experiences will help ensure you invest in a kit that delivers lasting and visually appealing results.
Step-by-Step Guide to Using a Vinyl Siding Hole Repair Kit
If you’ve noticed holes, cracks, or damage in your vinyl siding, using a vinyl siding hole repair kit can be a cost-effective and efficient way to restore your home’s exterior without needing a full panel replacement. Proper repairs will not only improve your home’s appearance but also protect it from moisture infiltration, mold growth, and further deterioration.
Follow this detailed, step-by-step guide to ensure a professional-looking and durable repair.
Step 1: Gather Your Materials
Before starting the repair, make sure you have everything you need to complete the job efficiently. Having the right tools and materials on hand will help ensure a seamless process.
Materials You Will Need:
✅ Vinyl siding hole repair kit (includes adhesive patches, filler, or color-matched material)
✅ Measuring tape (to measure the size of the hole or crack)
✅ Utility knife or scissors (for cutting repair materials to the correct size)
✅ Siding adhesive or caulk (ensure it’s compatible with vinyl siding)
✅ Clean cloth or sponge (for prepping the area)
✅ Mild soap and water (for cleaning the damaged section)
✅ Safety goggles and gloves (to protect yourself while handling tools)
✅ Vinyl-safe exterior paint (optional, for color-matching the repair)
Taking a few minutes to gather and organize these materials will make the repair process much smoother.
Step 2: Clean the Area Around the Hole
Before applying any patch or adhesive, you must clean the damaged area thoroughly to remove dirt, grime, or loose debris. A clean surface ensures better adhesion and a longer-lasting repair.
How to Clean the Area Properly:
- Use a mild soap and warm water mixture to wipe down the damaged section.
- Scrub away any loose siding material, peeling paint, or dirt buildup with a soft cloth or sponge.
- Rinse the area with clean water and allow it to dry completely before proceeding.
💡 Pro Tip: If there is mold or mildew present, use a solution of water and white vinegar to clean the surface before applying the patch.
Step 3: Measure the Damage
Carefully measure the width and height of the hole or crack to determine the appropriate patch size.
- For small holes or cracks (less than ½ inch): A vinyl caulk or filler may be sufficient.
- For medium-sized damage (½ inch to 3 inches): An adhesive-backed patch is ideal.
- For large holes (over 3 inches): A custom-cut vinyl piece may be necessary, and in some cases, replacing the entire siding panel might be a better solution.
⚠️ If the hole is large or structurally weakening the siding, replacing the full panel may be a more secure option.
Step 4: Cut the Patch to the Right Size
Once you’ve measured the hole, cut your patch slightly larger than the damaged area to ensure full coverage.
How to Cut the Patch Correctly:
- Use a utility knife or scissors to cut the repair patch from the material included in your kit.
- If using a self-adhesive patch, round the edges slightly to help it blend seamlessly.
- If using a replacement vinyl piece, make sure it matches the color and texture of your siding for a less noticeable repair.
💡 Pro Tip: If your kit doesn’t include a pre-colored patch, you can use a scrap piece of vinyl siding from a hardware store and cut it to size.
Step 5: Apply Adhesive or Filler
Depending on your repair method, you’ll either apply vinyl adhesive, caulk, or filler to secure the patch in place.
For Small Holes:
- Apply vinyl caulk or filler directly into the hole.
- Smooth it out with a putty knife or finger for a flush finish.
- Allow it to dry completely before painting or sealing.
For Larger Holes with a Patch:
- Apply a bead of vinyl siding adhesive or caulk around the edges of the hole.
- Press the patch firmly into place, ensuring all edges are sealed.
- Wipe away excess adhesive with a clean cloth to avoid visible residue.
⚠️ Avoid using household glue or general-purpose adhesives, as they may not bond properly with vinyl siding.
Step 6: Position and Secure the Patch
Carefully place the patch over the damaged area and press firmly to ensure a strong bond.
- If using a self-adhesive patch, smooth out any air bubbles or wrinkles.
- If using a vinyl siding piece, press it into place and use the adhesive to seal the edges.
- Hold the patch in place for 30-60 seconds to ensure it sticks properly.
💡 Pro Tip: If your siding is textured, gently rub the patched area with a soft cloth to blend it into the existing design.
Step 7: Blend the Repair for a Seamless Finish
To make the repair less noticeable, you may need to paint the patched area with a vinyl-safe exterior paint that matches your siding.
How to Blend the Repair:
- Choose a paint color that matches your siding.
- Use a small brush or sponge to lightly dab paint over the repaired section.
- Allow the paint to fully dry before assessing if additional coats are needed.
💡 Pro Tip: If your siding has a slightly glossy finish, apply a clear coat sealer over the painted repair for a closer match.
Step 8: Final Inspection and Cleanup
After your patch is in place and has dried, inspect the repair for any loose edges or gaps. If necessary, apply additional adhesive to reinforce the patch.
Final Touches:
✅ Remove any excess adhesive or caulk for a clean finish.
✅ Store leftover materials in case future touch-ups are needed.
✅ Dispose of scraps and clean tools properly.
🚨 Test the repair by gently pressing on the patched area. If it feels loose or starts to peel, reapply adhesive and smooth it down again.
Restoring Your Vinyl Siding Like a Pro
By following these detailed steps, your vinyl siding hole repair will not only look professional but will also last for years to come. Whether you’re fixing minor punctures or larger holes, using the right repair kit and techniques will ensure a seamless and durable finish.
Regular inspections and timely repairs extend the life of your siding, helping you avoid costly replacements and keeping your home looking its best. If you’re unsure about tackling larger repairs yourself, consider consulting a siding professional for expert advice.
Final Checklist for a Perfect Repair:
✅ Cleaned and prepped the damaged area
✅ Measured and cut the patch to size
✅ Used high-quality adhesive or filler
✅ Properly positioned and secured the patch
✅ Blended the repair with paint if necessary
✅ Checked for durability and sealed all edges
Now your siding should look good as new! 🌟🏡
Tips for Preparing Your Vinyl Siding Before Repair
When it comes to maintaining your home, addressing any damage to your vinyl siding promptly and correctly is essential. Even small holes or cracks can allow moisture to seep in, leading to potential mold growth, insulation issues, and further deterioration. Proper preparation before applying a repair kit ensures strong adhesion, a seamless finish, and long-lasting results.
Before diving into the repair process, follow these key preparation steps to make sure your siding is ready for repair.
1. Clean the Damaged Area Thoroughly
A clean surface is essential for a successful repair. Dirt, mildew, and residue can interfere with the adhesive, causing patches or fillers to fail over time.
How to Properly Clean the Area:
✔ Mix warm water and mild detergent (avoid harsh chemicals that can degrade vinyl).
✔ Use a soft brush, sponge, or microfiber cloth to scrub away dirt and mildew.
✔ For stubborn stains or mold: Use a solution of one-part vinegar to three parts water to break down buildup.
✔ Rinse the area with clean water and allow it to dry completely before proceeding.
💡 Pro Tip: Avoid using pressure washers at close range, as they can force water behind the siding panels, leading to trapped moisture issues.
2. Assess the Extent of the Damage
Before choosing your repair method, take a close look at the size and type of damage:
- Small Punctures (less than ½ inch): A vinyl caulking or filler will work best.
- Medium-Sized Holes (½ inch – 3 inches): A self-adhesive vinyl patch is ideal.
- Larger Holes (over 3 inches) or Deep Cracks: You may need to replace an entire siding panel instead of patching.
How to Determine If a Full Panel Replacement is Needed:
✔ If multiple holes or deep cracks are present in the same panel.
✔ If the siding is warped, brittle, or discolored, which may indicate aging material.
✔ If you notice moisture damage behind the panel, replacing the entire section may be a better long-term solution.
💡 Pro Tip: Take photos of the damage and measure it before purchasing your repair kit. This will help you choose the correct patch size and material.
3. Gather All Necessary Tools and Materials
Having everything ready beforehand will make the repair process smoother and prevent delays or mistakes.
Essential Tools to Have on Hand:
🔹 Vinyl Siding Hole Repair Kit (includes patches, adhesive, or filler)
🔹 Measuring Tape (to size your repair materials properly)
🔹 Utility Knife or Scissors (for trimming patches or removing damaged siding)
🔹 Caulking Gun (if using vinyl caulk or adhesive)
🔹 Screwdriver or Pry Bar (for lifting or adjusting siding panels if necessary)
🔹 Gloves and Safety Goggles (to protect your hands and eyes from sharp edges or debris)
🔹 Paint (optional) – If your patch doesn’t match the existing siding color, you may need vinyl-safe paint to blend it seamlessly.
💡 Pro Tip: If you’re replacing a siding panel, you may also need a zip tool to unhook and remove the damaged panel easily.
4. Read and Understand the Repair Kit Instructions
Every vinyl siding hole repair kit is different, and following manufacturer guidelines is crucial to ensure a long-lasting repair.
Key Things to Check in the Instructions:
✔ Drying or Curing Times – Some adhesives require a specific time to set before further handling.
✔ Temperature Requirements – Some kits work best at specific temperatures (e.g., between 50°F and 85°F).
✔ Application Techniques – Some patches require extra pressure or smoothing to blend in properly.
💡 Pro Tip: Watch a video tutorial if your kit includes one or check online reviews for extra guidance on using a specific product.
5. Choose the Right Weather Conditions for Repair
Extreme temperatures can affect adhesive strength and the overall durability of your repair.
Ideal Weather Conditions for Repair:
✔ Mild temperatures (between 50°F and 85°F) – Adhesives and caulk bond better in moderate weather.
✔ Low humidity levels – High humidity can slow down drying times and affect adhesion.
✔ Minimal wind – Strong winds can blow dust onto the repair, preventing proper adhesion.
🚨 Avoid repairing siding in:❌ Extreme heat (above 90°F) – Adhesive may become too runny or lose strength.
❌ Freezing temperatures (below 40°F) – Vinyl becomes brittle, making it more prone to cracking or snapping.
💡 Pro Tip: If you must repair siding in cold weather, warm up the patch or siding using a hairdryer on a low setting before applying adhesive.
6. Protect Surrounding Areas
Before applying the repair, take steps to protect nearby siding and surfaces to prevent accidental damage or messes.
How to Protect Adjacent Siding Panels:
✔ Use painter’s tape to mask off areas around the repair to prevent adhesive overflow.
✔ Lay down a cloth or plastic sheet to catch any debris, especially if sanding or cutting is involved.
✔ If painting, use a drop cloth to avoid getting paint on unwanted areas.
💡 Pro Tip: If using caulk or adhesive, keep baby wipes or a damp cloth nearby to quickly clean up any accidental smears before they dry.
Set Yourself Up for a Successful Repair
Taking the time to properly prepare your siding before repair will make a significant difference in how long-lasting and seamless your repair turns out.
By following these preparation steps—cleaning, assessing damage, gathering tools, reading instructions, choosing the right weather, and protecting surrounding areas—you’ll ensure a smooth and professional-quality repair.
Final Checklist Before Starting the Repair:
✅ Area is cleaned and dry✅ Damage is measured and assessed✅ All tools and materials are gathered✅ Instructions have been reviewed✅ Weather conditions are ideal✅ Surrounding areas are protected
With these preparations complete, you’re now ready to apply your vinyl siding hole repair kit with confidence! 🎯🏡
Maintenance Tips to Prevent Future Damage to Your Vinyl Siding
Vinyl siding is a durable, low-maintenance option for homeowners, but like any exterior material, it is still vulnerable to damage over time. Regular maintenance is key to preserving its integrity, preventing costly repairs, and ensuring that your home remains well-protected and visually appealing for years to come.
By following these essential maintenance tips, you can significantly reduce the risk of cracks, holes, and other damage, ultimately prolonging the lifespan of your siding.
1. Clean Your Vinyl Siding Regularly
Over time, dirt, mildew, mold, and other contaminants can accumulate on vinyl siding, causing discoloration and weakening its surface. Regular cleaning not only keeps your home looking fresh but also helps prevent long-term damage.
Best Practices for Cleaning Vinyl Siding:
✔ Wash at least once a year – Ideally, clean your siding every spring or early summer to remove winter grime.
✔ Use a gentle soap solution – Mix one part vinegar to three parts water or use a mild dish soap diluted in water.
✔ Scrub with a soft-bristle brush – Avoid abrasive materials that can scratch the siding.
✔ If using a pressure washer, keep the nozzle at least 3-4 feet away and spray at a downward angle to prevent water from getting behind the panels.
💡 Pro Tip: If you live in a humid area, mold and mildew may form faster. Consider adding a mold-resistant cleaner to your washing routine.
2. Perform Seasonal Inspections
Regular inspections allow you to catch minor issues before they become major problems. Small holes, loose panels, and minor cracks can be quickly repaired with a vinyl siding hole repair kit before they escalate into larger structural concerns.
What to Check for During an Inspection:
✔ Holes, cracks, or warping – Look for any visible damage caused by weather, impacts, or aging.
✔ Loose or missing panels – Ensure all siding panels are properly secured to prevent wind damage.
✔ Discoloration or fading – While normal over time, excessive fading could indicate material weakening.
✔ Water damage signs – Peeling paint on nearby surfaces or mold growth could suggest moisture is seeping behind the siding.
💡 Pro Tip: Walk around your home at least twice a year (spring and fall) to inspect your siding, and after severe storms or high winds.
3. Protect Against Insects and Pests
Certain pests can damage vinyl siding by chewing through it or creating openings that allow moisture to enter. Birds, rodents, and insects like carpenter ants and termites can cause unexpected deterioration.
Preventive Measures:
✔ Seal gaps and cracks to block entry points.
✔ Trim trees and bushes near the home to prevent pests from reaching your siding.
✔ Look for tiny holes or droppings that indicate an insect infestation.
✔ If needed, call a professional exterminator for severe infestations.
💡 Pro Tip: Woodpeckers are known to damage vinyl siding. Use reflective deterrents or bird repellents to keep them away.
4. Ensure Proper Weatherproofing
One of the biggest threats to vinyl siding is moisture infiltration. If water gets behind the siding, it can cause mold, rot, and structural damage.
How to Keep Your Siding Weatherproofed:
✔ Check for gaps around windows and doors – Apply caulk or sealant where needed.
✔ Inspect siding joints and seams for separation.
✔ Ensure gutters and downspouts are directing water away from the siding.
✔ If your home is in a region with frequent storms, consider storm shutters or windbreakers for added protection.
💡 Pro Tip: Avoid excessive sprinkling or watering near your siding to reduce moisture-related damage.
5. Prevent Impact Damage
Many vinyl siding issues result from accidental impacts, whether from tools, toys, or yard equipment.
How to Reduce Impact Risks:
✔ Keep grills, bikes, and heavy objects at a safe distance from your siding.
✔ Be mindful when using lawn mowers and weed trimmers – flying debris can cause cracks.
✔ Install a protective barrier if you have high-traffic areas near your siding.
💡 Pro Tip: If you have children who play outside, establish a designated play area away from siding to prevent accidental damage.
Final Thoughts on Siding Maintenance
By following these maintenance tips, you can extend the lifespan of your vinyl siding, keep it looking fresh, and prevent costly repairs. Addressing minor issues early with a vinyl siding hole repair kit ensures your home remains protected from the elements and maintains its curb appeal.
Repairing Your Vinyl Siding with Confidence
Vinyl siding is a durable and visually appealing choice for homeowners, but it isn’t invincible. Whether your siding has suffered small holes, cracks, or more significant damage, a vinyl siding hole repair kit can help restore its appearance and functionality.
Why Proper Repair and Maintenance Matter:
✅ Helps prevent moisture damage and mold growth
✅ Extends the lifespan of your siding
✅ Maintains your home’s energy efficiency
✅ Saves money by avoiding expensive professional repairs
✅ Improves curb appeal and resale value
By choosing the right repair kit and following a step-by-step approach, you can effectively repair any damage and ensure a seamless, professional-looking finish.
Your Next Steps:
- Inspect your siding for any current or potential damage.
- Choose a high-quality vinyl siding hole repair kit that matches your needs.
- Follow the step-by-step repair guide for a long-lasting and professional fix.
- Continue regular maintenance to prevent future issues.
By taking a proactive approach, you can protect your investment, keep your home looking beautiful, and enjoy the benefits of vinyl siding for years to come.
Final Takeaway:
A well-maintained home is a valuable home. Stay ahead of repairs, address issues before they escalate, and keep your siding in peak condition—ensuring that your home remains strong, beautiful, and well-protected for years to come.
🏡 Your home deserves the best—start maintaining your siding today! 🏡
What is a vinyl siding hole repair kit?
A vinyl siding hole repair kit is a specially designed set of tools and materials to fix holes or damages in vinyl siding, helping restore the appearance and integrity of your home’s exterior.
What are common causes of holes in vinyl siding?
Common causes of holes in vinyl siding include impact from hail, falling branches, animal damage, and normal wear and tear over time.
How do I choose the right vinyl siding hole repair kit?
To choose the right kit, consider factors such as the size and type of damage, the color of your siding, and whether you prefer DIY solutions or professional-grade repairs.
Can I repair vinyl siding holes myself?
Yes, many homeowners can successfully repair vinyl siding holes using a repair kit, following the step-by-step instructions provided in the kit and ensuring proper preparation of the siding.
What maintenance tips can help prevent future damage to my vinyl siding?
Regularly cleaning your vinyl siding, inspecting it for damage, trimming nearby trees, and ensuring proper drainage can help prevent future damage and extend the lifespan of your siding.